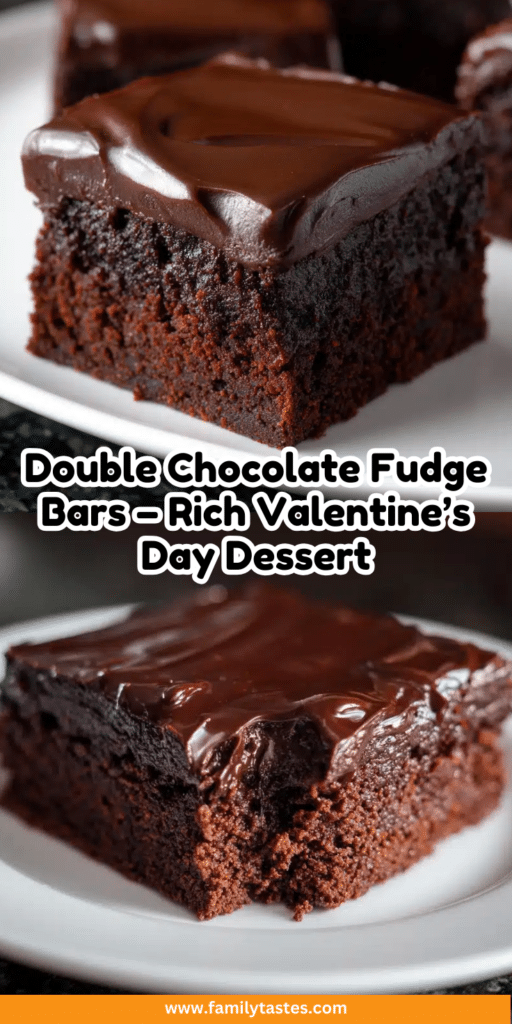
Oh my gosh, you guys, these double chocolate fudge bars are my absolute weakness! I’ve been making this recipe for years, and let me tell you, they disappear faster than I can say “just one more bite.” The rich, fudgy texture is what dreams are made of, chewy in the middle with that perfect crackly top. And that silky chocolate ganache? Forget about it!
What I love most is how simple they are to whip up. Even when I’m short on time (or patience), these bars come together in no time. They’re perfect for Valentine’s Day, sure, but honestly? Any day that ends with “y” is a good day for chocolate in my book. I’ve brought these to countless potlucks and parties, and without fail, someone always asks for the recipe. That’s how you know it’s a keeper!

The secret is in the double dose of chocolate, both in the batter and that luscious topping. Trust me, one bite and you’ll understand why these are my go-to when I need to impress (or just treat myself).
Why You’ll Love These Double Chocolate Fudge Bars
Let me count the ways these bars will steal your heart (and your sweet tooth):
- Rich, fudgy perfection: That double chocolate punch, in the batter and the glossy topping, makes every bite feel like a decadent treat.
- Foolproof baking: No fancy techniques here! Just melt, mix, and bake. Even my most baking-challenged friends nail this recipe.
- Crowd-pleaser magic: I’ve yet to meet someone who can resist these. They’re the first dessert to disappear at parties, every single time.
- Better than boxed: That homemade taste? Worth the extra 10 minutes, promise. The texture is chewy-crisp heaven you just can’t buy.
- Any-occasion happy: Valentine’s Day, Tuesday afternoons, “I survived my workday” celebrations, they’re always a good idea.
Seriously, these bars are little squares of joy. You’ll see!

Double Chocolate Fudge Bars
Ingredients
Equipment
Method
- Preheat your oven to 350°F (175°C). Grease a 9×13 inch baking pan.
- In a mixing bowl, combine melted butter, sugar, eggs, and vanilla extract. Mix until smooth.
- Add flour, cocoa powder, and salt to the bowl. Stir until fully combined.
- Pour the batter into the prepared baking pan. Bake for 25 minutes or until a toothpick inserted comes out clean.
- While the bars cool, prepare the fudge topping. In a saucepan, heat chocolate chips, heavy cream, and butter over low heat until melted and smooth.
- Spread the fudge topping evenly over the cooled bars. Let it set before cutting into squares.
Notes
Ingredients for Double Chocolate Fudge Bars
Gather these simple ingredients, I promise you probably have most in your pantry already! The magic happens when you combine them just right.
For the Bars
- 1 cup unsalted butter, melted (that’s 2 sticks, and yes, real butter makes all the difference!)
- 2 cups granulated sugar (don’t even think about cutting back, this is dessert, people!)
- 4 large eggs (room temperature if you can plan ahead, but I’ve used cold ones in a pinch)
- 1 tsp vanilla extract (the good stuff, not imitation, trust me on this)
- 1 cup all-purpose flour (spooned and leveled, not packed)
- ½ cup cocoa powder (I use Dutch-processed for extra richness)
- ¼ tsp salt (just enough to make the chocolate flavors pop)
For the Fudge Topping
- 1 cup semi-sweet chocolate chips (or chop up your favorite chocolate bar if you’re feeling fancy)
- ½ cup heavy cream (whipping cream works too in a pinch)
- 1 tbsp unsalted butter (because more butter is always better)

See? Nothing crazy here, just quality ingredients that transform into something magical. Now let’s get baking!
Equipment Needed
You won’t need any fancy gadgets for these bars, just the basics from your kitchen! Grab these trusty tools:
- A 9×13 inch baking pan (my well-loved one has seen countless batches)
- A good mixing bowl (I use my grandma’s old yellow Pyrex, the sentimental value makes them taste better, right?)
- A medium saucepan (for that dreamy fudge topping)
That’s it! Now let’s make some magic happen.
How to Make Double Chocolate Fudge Bars
Alright, let’s get to the good part, making these heavenly bars! Don’t let the rich flavor fool you; the process couldn’t be simpler. Just follow these steps, and you’ll be in chocolate bliss before you know it.
1. Preheat and Prep
First things first, crank that oven to 350°F (175°C). While it’s heating up, grab your 9×13 inch pan and give it a good greasing. I like to use butter and a dusting of cocoa powder instead of flour, keeps those chocolate vibes going strong!
2. Mix the Wet Ingredients
In your trusty mixing bowl, combine the melted butter and sugar. Stir until they’re best friends, about a minute should do it. Then crack in those eggs one at a time, mixing after each addition. Splash in the vanilla and give it another good stir. The batter should look smooth and slightly glossy.
3. Add the Dry Ingredients
Now for the chocolatey magic! Dump in the flour, cocoa powder, and salt all at once. Stir gently just until everything’s combined, no need to overmix here. The batter will be thick and fudgy, almost like brownie batter. That’s exactly what we want!
4. Bake to Perfection
Pour that luscious batter into your prepared pan, smoothing it out evenly. Pop it in the oven for about 25 minutes. You’ll know they’re done when the edges pull away slightly from the pan and a toothpick comes out with moist crumbs (not wet batter). Resist the urge to overbake, we want these chewy, not dry!
5. Make the Fudge Topping
While the bars cool slightly, let’s make that irresistible topping. Combine chocolate chips, heavy cream, and butter in a saucepan over low heat. Stir constantly until it’s silky smooth, about 3-5 minutes. Pro tip: Don’t walk away! Chocolate burns faster than you’d think.
6. Top and Set
Pour that glossy ganache over the warm bars, spreading it evenly with a spatula. Now comes the hardest part, waiting! Let them cool completely before cutting (about 2 hours). I know, I know, torture. But trust me, letting the fudge set properly means cleaner slices and maximum enjoyment.

And there you have it! Rich, fudgy bars with that dreamy chocolate topping. Try not to eat them all in one sitting, though I won’t judge if you do!
Tips for Perfect Double Chocolate Fudge Bars
After baking way too many batches of these bars (all in the name of research, of course), I’ve picked up some killer tricks:
- Watch that toothpick: Pull them out when it has a few moist crumbs, wet batter means more time, but dry means you’ve gone too far!
- Patience is key: Let the topping set completely before cutting. I know it’s hard, but rushing means messy slices.
- Room temp eggs: They incorporate better into the batter. No time? Just soak cold eggs in warm water for 5 minutes.
- Line your pan: For super-clean slices, use parchment paper with overhangs to lift the whole batch out before cutting.
- Underbake slightly: They’ll keep cooking as they cool, giving you that perfect fudgy center.
Follow these tips, and you’ll get bakery-worthy bars every single time! For more baking inspiration, check out other great recipes.
Variations for Double Chocolate Fudge Bars
Oh, the possibilities! While I adore the classic version, sometimes I like to mix things up:
- Sea salt sprinkle: A pinch of flaky salt on the warm fudge topping? Absolute magic, sweet and salty perfection!
- Dark chocolate twist: Swap semi-sweet chips for dark chocolate in the topping, extra intense flavor for true chocoholics.
- Nutty delight: Fold in ½ cup chopped walnuts or pecans to the batter for crunch.
- Peanut butter swirl: Dollop melted PB on the batter before baking, marble it in for pretty swirls.
See? One recipe, endless ways to fall in love all over again! If you are looking for other decadent desserts, you might enjoy these million dollar brownies.
Serving and Storing Double Chocolate Fudge Bars
Okay, here’s the fun part, eating these beauties! I like to cut them into generous squares (about 12 for a 9×13 pan) because, let’s be real, who wants a tiny piece of chocolate heaven? For special occasions, I’ll dust them with powdered sugar or top with fresh berries to make them look extra fancy.
Storing is a breeze, just pop them in an airtight container at room temperature. They’ll stay fresh for up to 5 days (if they last that long in your house!). The fudge topping actually gets even more delicious as it sits, developing deeper chocolate flavor. If you’re feeling indulgent, a quick 10-second zap in the microwave makes them taste freshly baked again, just enough to slightly warm the fudge without melting it completely.
Pro tip: Layer them with parchment paper if stacking in your container, that gorgeous fudge topping stays picture-perfect this way!
Nutritional Information
Each delicious bar clocks in at about 320 calories, with 18g of fat (11g saturated), 38g carbs, and 4g protein. Keep in mind these are estimates, your exact numbers might vary slightly based on specific ingredients. But hey, we’re here for the joy, not the math!
Frequently Asked Questions
I get asked about these bars all the time, here are the answers to the most common chocolatey dilemmas:
Can I use milk chocolate instead of semi-sweet?
Absolutely! The topping will be sweeter (obviously), but just as delicious. I sometimes do half milk, half dark chips for the best of both worlds.
Help! How do I prevent overbaking?
Set a timer for 20 minutes and start checking. The edges should look set, but the center should still jiggle slightly. Remember, they keep cooking as they cool!
Can I make these gluten-free?
You bet! Swap the all-purpose flour for a 1:1 gluten-free blend. I’ve had great results with Bob’s Red Mill.
Why did my topping turn grainy?
You might have heated it too quickly. Low and slow is the way to go when melting chocolate. If it happens, whisk in a teaspoon of hot water to smooth it out.
Can I freeze these bars?
Oh yes! Freeze them unfrosted or frosted, just wrap tightly. Thaw at room temp when the craving hits. The fudge topping stays perfectly creamy!
Now it’s your turn! I’d love to hear how your bars turned out, tag me in your photos or leave a comment below. Did you add a special twist? Have a baking win (or hilarious fail) to share? This recipe always sparks the best kitchen stories, and I can’t wait to read yours! For more fun baking ideas, check out our desserts category.