Valentine’s Day baking just got a whole lot cuter with these animal-shaped heart cookies! I’ve been making these sweet treats for years, ever since my niece declared regular heart cookies “too boring.” That’s when I got creative, combining adorable animal shapes with classic heart outlines. The result? Pure magic that makes everyone smile when they see the cookie tray. These aren’t just desserts, they’re edible love notes with personality. The best part? You don’t need fancy skills to make them. Just some simple cookie dough, your favorite animal cutters (bears, bunnies, and puppies work great!), and a heart-shaped cutter to create the perfect Valentine’s Day surprise.

Why You’ll Love These Animal-Shaped Heart Cookies
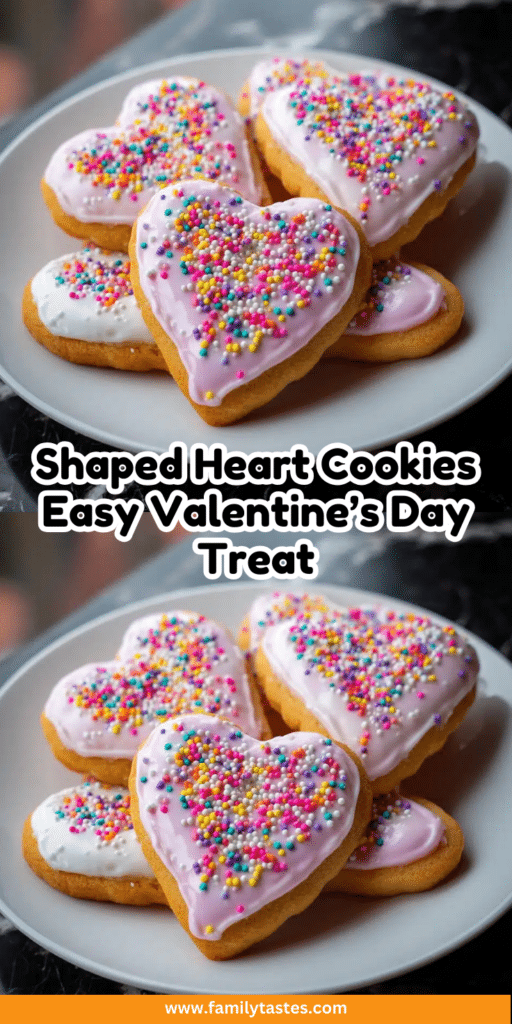
Trust me, these aren’t your average Valentine’s cookies, they’re little bundles of joy that’ll make your heart skip a beat! Here’s why they’ve become my go-to treat:
- Super simple to make, no fancy techniques, just good old-fashioned cookie dough that comes together in minutes
- Endless fun with shapes, mix and match animal cutters with hearts for cookies that tell a sweet story
- Perfect for sharing love, kids adore them, adults can’t resist them, and they make the sweetest homemade gifts
- Customizable cuteness, go wild with decorations! Pink bunnies? Purple elephants? Your imagination’s the limit
The best part? Watching faces light up when you pull these adorable cookies out of the oven. Pure baking magic!

Animal-Shaped Heart Cookies
Ingredients
Method
- Preheat your oven to 350°F (175°C). Line baking sheets with parchment paper.
- In a large bowl, cream together the butter and sugar until light and fluffy.
- Beat in the egg and vanilla extract until well combined.
- In a separate bowl, whisk together the flour, baking powder, and salt.
- Gradually add the dry ingredients to the wet ingredients, mixing until a dough forms.
- Roll out the dough on a floured surface to about 1/4-inch thickness.
- Use animal-shaped and heart-shaped cookie cutters to cut out cookies.
- Place the cookies on the prepared baking sheets and bake for 8-10 minutes, or until the edges are lightly golden.
- Let the cookies cool on the baking sheets for 5 minutes before transferring to a wire rack to cool completely.
- For the icing, whisk together the powdered sugar, milk, and vanilla extract until smooth. Add food coloring if desired.
- Decorate the cooled cookies with the icing and sprinkles.
Notes
Ingredients for Animal-Shaped Heart Cookies
Gathering your ingredients is the first step to cookie magic! Here’s everything you’ll need to create these adorable treats. I’ve separated them into dough ingredients and decorations because, let’s be honest, that’s how my brain works when I’m baking!
For the Cookies
- 1 cup unsalted butter – softened (this means it should dent when you press it, but not be melty)
- 1 cup granulated sugar – the sweet foundation of our cookies
- 1 large egg – helps bind everything together
- 2 tsp vanilla extract – my secret for that warm, comforting flavor
- 3 cups all-purpose flour – spooned and leveled, don’t pack it!
- 1 tsp baking powder – gives our cookies just the right lift
- ½ tsp salt – balances the sweetness perfectly
For Decoration
- 1 cup powdered sugar – for that smooth, glossy icing
- 2 tbsp milk – whole milk works best for richness
- 1 tsp vanilla extract – yes, more vanilla! It makes the icing taste amazing
- Food coloring (optional) – gel colors give vibrant hues without thinning the icing
- Sprinkles (optional) – because everything’s better with sparkles!

See? Nothing too fancy, just good, simple ingredients that come together to make something truly special. Now let’s get mixing!
How to Make Animal-Shaped Heart Cookies
Ready to turn that dough into adorable edible art? Here’s exactly how I make these cookies every Valentine’s Day – with all the little tricks I’ve learned over the years to make them perfect!
Preparing the Dough
First, let’s get that butter and sugar nice and fluffy! I use my hand mixer on medium speed for about 2 minutes – you’ll know it’s ready when it turns pale and looks almost like whipped cream. Then beat in that egg and vanilla until everything’s perfectly combined. The dry ingredients? Whisk them together separately first – this prevents lumps and makes sure your baking powder gets evenly distributed. Add them to the wet ingredients in three batches, mixing just until combined after each. The dough should come together nicely but not be sticky – if it is, add a tablespoon more flour.
Shaping and Baking the Cookies
Here’s where the magic happens! Lightly flour your surface and roll the dough to about 1/4-inch thickness – any thinner and they might burn, any thicker and they won’t get that perfect snap. Press those animal and heart cutters firmly straight down – no twisting! Twisting can seal the edges and prevent rising. Space them about 1 inch apart on parchment-lined baking sheets. Bake at 350°F for 8-10 minutes – you want just the faintest golden edge. They’ll seem soft when they come out, but don’t worry! Let them rest on the pan for 5 minutes before moving to a cooling rack.
Decorating Your Animal-Shaped Heart Cookies
Now for the fun part! Whisk together your powdered sugar, milk, and vanilla until smooth – aim for a thick but pourable consistency. If it’s too runny, add more sugar; too thick, add milk a few drops at a time. Divide into bowls and tint with gel food coloring – I like pastel pinks and blues for animals. Use a spoon to drizzle or a piping bag for details. Add sprinkles immediately before the icing sets! Pro tip: decorate one cookie fully first to test your icing consistency before doing the whole batch.
Tips for Perfect Animal-Shaped Heart Cookies
After making countless batches of these cookies, I’ve picked up some game-changing tricks! First, chill your dough for 30 minutes before rolling – it prevents spreading and gives you crisp edges on those animal shapes. Second, use gel food coloring instead of liquid – the colors stay vibrant without making your icing runny. Third, bake one test cookie first to check your oven’s temperature – every oven runs differently! And my favorite tip? Freeze extra dough balls for last-minute cookie emergencies (because let’s be honest, those happen).
Variations for Animal-Shaped Heart Cookies
Want to mix things up? Try swapping vanilla for almond extract, it gives such a lovely floral note! For chocolate lovers, replace 1/4 cup flour with cocoa powder. Gluten-free? Use your favorite 1:1 flour blend, I’ve had great results with Bob’s Red Mill. And don’t feel limited to animals! Dinosaurs, stars, or even simple circles with heart cutouts work beautifully too. The possibilities are endless!

Storing and Serving Animal-Shaped Heart Cookies
These cookies stay fresh in an airtight container at room temperature for up to 5 days, if they last that long! For gifting, I love stacking them in clear cellophane bags tied with ribbon, or arranging them in a vintage tin. They also freeze beautifully for up to 3 months, just layer them between parchment paper in a freezer-safe container. Perfect for when you need a last-minute “I love you!”
Nutritional Information
Nutritional values will vary depending on specific ingredients used. These sweet treats are meant for enjoying in moderation as part of a balanced diet. For more general baking ideas, check out baking resources.
FAQs About Animal-Shaped Heart Cookies
I get asked these questions all the time when I make these adorable cookies! Here are the answers that’ll help you bake with confidence:
Can I freeze the cookie dough? Absolutely! Shape it into a disk, wrap tightly in plastic, and freeze for up to 3 months. Thaw overnight in the fridge before rolling. You can even freeze cut-out shapes on a tray before baking, just add 1-2 minutes to the bake time!
How do I prevent my cookies from spreading? Make sure your butter is softened but still cool, not melty. Chilling the dough before baking helps too. And always use parchment paper, it keeps the bottoms from getting too hot.
Can kids help decorate these? Yes! This is the perfect project for little hands. Put icing in squeeze bottles for easier control, and lay down wax paper to catch sprinkles. The messier, the more fun!
What if I don’t have animal cookie cutters? No worries! Use whatever shapes you have, hearts alone are lovely. Or get creative, a round cutter can become a bear face with some icing details!
I’d love to see your adorable creations! Tag me @[YourHandle] when you share photos, nothing makes me happier than spotting these sweet cookies out in the wild! If you are looking for more fun kid-friendly recipes, explore our site!