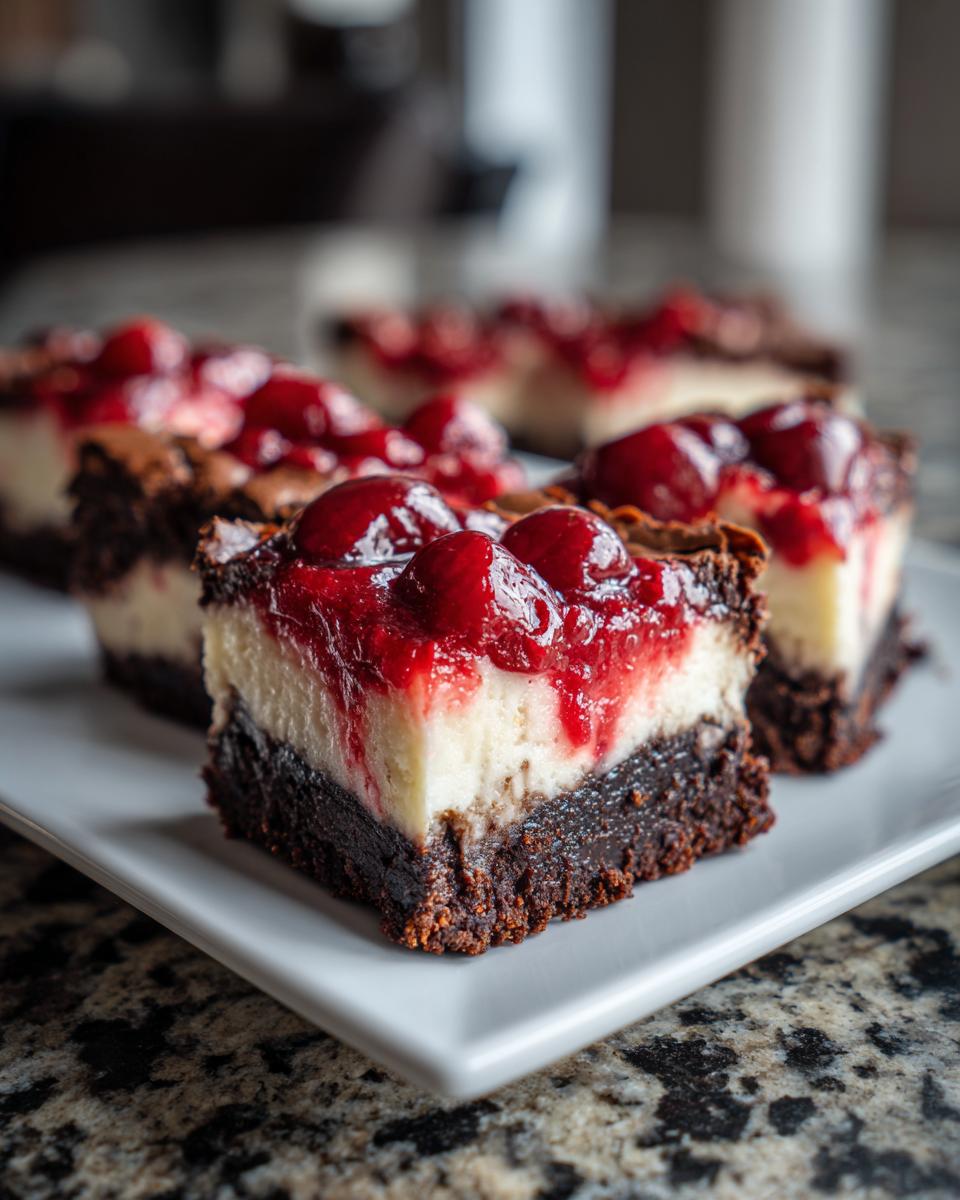
Oh my goodness, do I have a treat for you! These Cherry Cheesecake Brownie Bars are my absolute weakness – the perfect marriage of fudgy chocolate and creamy cheesecake with those sweet cherry surprises. I first made them for Valentine’s Day years ago when I wanted to impress my now-husband (it worked – he proposed over a plate of these!). Now they’re our annual tradition. There’s just something magical about how the rich brownie base cuddles up to that tangy cheesecake layer, with pops of cherry that make every bite feel like a little love note. Trust me, one bite and you’ll be hooked!
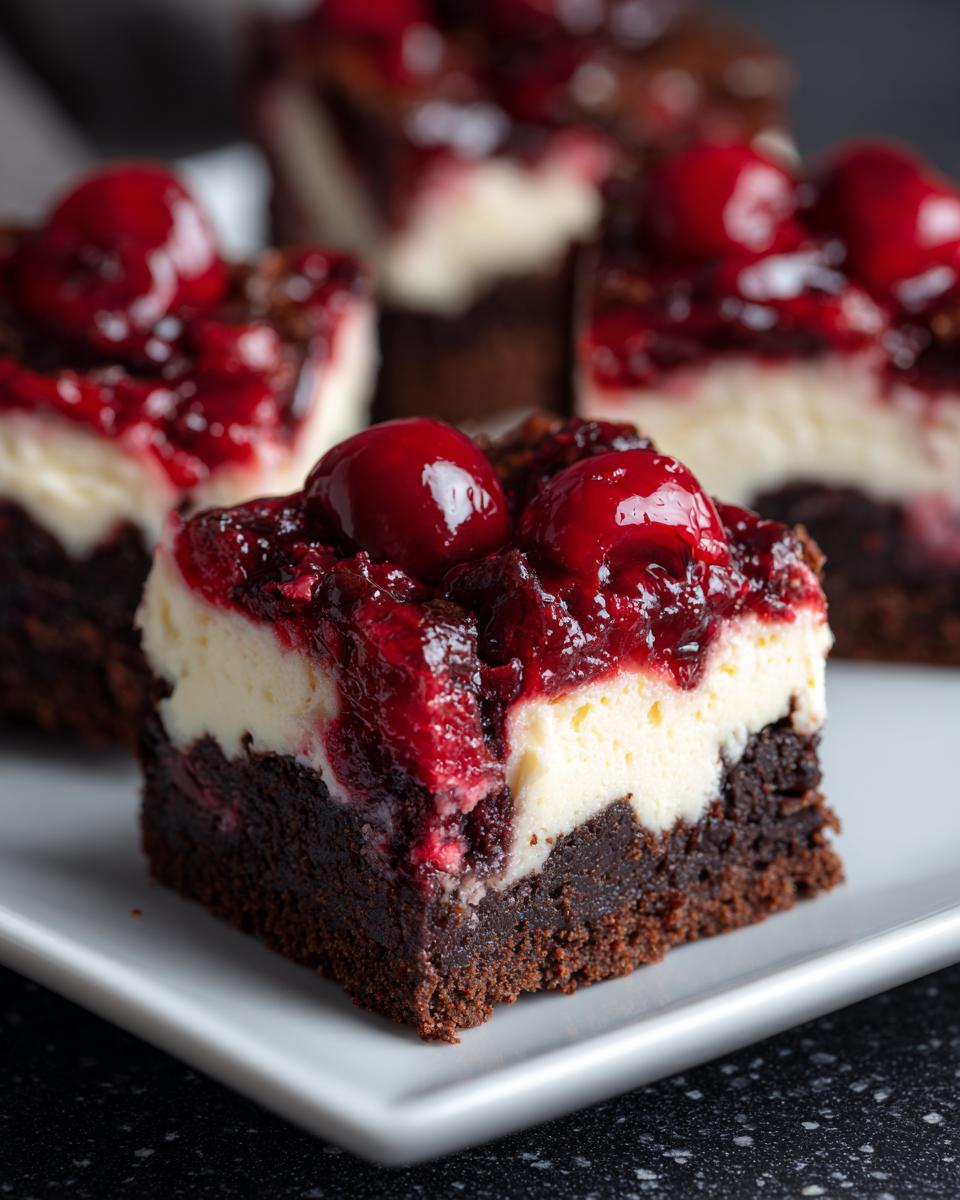

Cherry Cheesecake Brownie Bars
Ingredients
Method
- Preheat the oven to 350°F (175°C). Grease a 9×13-inch baking pan.
- In a large bowl, mix melted butter and sugar. Add eggs and vanilla, stirring until combined.
- Mix in flour, cocoa powder, and salt until the brownie batter is smooth. Spread evenly in the pan.
- In another bowl, beat cream cheese and sugar until smooth. Add egg and vanilla, mixing well.
- Pour the cheesecake mixture over the brownie layer. Drop spoonfuls of cherry pie filling on top.
- Bake for 30 minutes or until the edges are set. Let cool before cutting into bars.
Notes
Ingredients for Cherry Cheesecake Brownie Bars
Gathering the right ingredients is half the battle with these dreamy bars. I’ve learned the hard way that using room temperature cream cheese makes all the difference, cold cream cheese will leave you with lumpy cheesecake, and nobody wants that! Here’s everything you’ll need to create pure dessert magic:
For the Brownie Layer
- 1 cup butter, melted (I use unsalted, but salted works too, just skip the extra salt)
- 2 cups sugar (pack it lightly in your measuring cup)
- 4 large eggs (yes, four! This makes that fudgy texture we love)
- 1 teaspoon pure vanilla extract (the good stuff, please!)
- 1 ½ cups all-purpose flour (spoon and level it, don’t scoop!)
- ½ cup cocoa powder (Dutch-processed gives the richest flavor)
- ½ teaspoon salt (balances all that sweetness perfectly)
For the Cheesecake Layer
- 16 oz cream cheese, softened (leave it out for at least 2 hours)
- ½ cup sugar
- 1 large egg
- 1 teaspoon vanilla extract
- 1 cup cherry pie filling (I sometimes sneak in extra cherries because why not?)
A quick tip from my many kitchen experiments: measure everything before you start mixing. There’s nothing worse than having to stop mid-recipe because you forgot to soften the cream cheese (been there, done that). Now let’s get baking!
How to Make Cherry Cheesecake Brownie Bars
Okay, let’s get our hands dirty and make some magic happen! I’ve made these bars so many times I could probably do it in my sleep, but I’ll walk you through each step carefully. The secret is in the layers, we want that perfect fudgy brownie base, creamy cheesecake middle, and those juicy cherry surprises on top.
1. Prep and Preheat
First things first, preheat that oven to 350°F (175°C). While it’s warming up, grab your 9×13-inch baking pan and give it a good greasing. I like to use butter for this, it helps the edges get nice and crispy. You could line it with parchment paper too if you want super clean slices later (smart move if you’re giving these as gifts!).
2. Mix the Brownie Batter
In a big bowl, mix your melted butter and sugar until they’re best friends. Then crack in those 4 eggs one at a time, mixing after each addition, this helps create that perfect texture. Splash in the vanilla and give it another good stir. Now dump in your dry ingredients (flour, cocoa powder, and salt) all at once. Mix just until combined, overmixing makes tough brownies, and we want fudgy! The batter will be thick and glorious.
3. Spread the Brownie Layer
Pour that chocolatey heaven into your prepared pan and spread it evenly. A little trick I’ve learned, wet your fingers slightly to press it into the corners without sticking. This layer is going to bake up into the most delicious brownie “mattress” for our cheesecake!

4. Make the Cheesecake Layer
Now for the creamy part! In another bowl (I just wipe out the brownie bowl to save dishes), beat your softened cream cheese until it’s smooth as silk. Add the sugar and beat until fluffy, about 1 minute. Crack in that egg and vanilla, mixing just until combined. Don’t overdo it here, we want creamy, not airy.
5. Layer and Swirl
Pour the cheesecake mixture over your brownie layer and smooth it gently. Now the fun part, drop spoonfuls of cherry pie filling all over the top. I like to use about 6 dollops, then take a knife and swirl it just slightly, not too much, or you’ll lose those pretty cherry pockets!
6. Bake and Cool
Slide your masterpiece into the oven and bake for 30 minutes. You’ll know it’s done when the edges are set but the center still has a slight jiggle, it’ll firm up as it cools. Resist the urge to cut right away! Let it cool completely in the pan (about 2 hours) for clean slices. If you can wait, chilling them in the fridge for an hour makes them even better. The hardest part is the waiting, but trust me, it’s worth it!
There you have it, the step-by-step to dessert paradise. Just writing this makes me want to whip up another batch! Now let’s talk about why you’re going to fall head over heels for these bars…
Why You’ll Love These Cherry Cheesecake Brownie Bars
Listen, I don’t like playing favorites with my desserts, but these bars? They’re something special. Here’s why they’ve stolen my heart (and probably will steal yours too!):
- That unbeatable texture combo, The fudgy brownie base gives way to creamy cheesecake, with little bursts of juicy cherries. It’s like three desserts in one bite!
- Surprisingly simple to make, No fancy techniques here. If you can mix ingredients in a bowl, you can make these. My 10-year-old niece mastered them last Valentine’s Day (and instantly became the family baking star).
- Perfect for Valentine’s Day (or any day!), The pink swirls from the cherries make them look fancy, but honestly, I make these year-round. They’re just too good to save for one holiday.
- Crowd-pleaser magic, I’ve brought these to potlucks, bake sales, and even a wedding shower. Every single time, people beg for the recipe. They disappear faster than you can say “seconds please!”
- Better the next day, If you can resist eating them all immediately (good luck!), the flavors meld beautifully overnight. The cheesecake gets even creamier, and the brownie stays perfectly fudgy.
Seriously, what’s not to love? They’re the dessert equivalent of a warm hug, comforting, indulgent, and impossible to resist. Just warning you now: once you make them, you’ll be asked to bring them to every gathering. Consider yourself warned!
Tips for Perfect Cherry Cheesecake Brownie Bars
After making these bars more times than I can count (and eating even more!), I’ve picked up some tricks that make all the difference between good and knock-your-socks-off amazing. Here are my hard-earned secrets:
Softened cream cheese is non-negotiable
I can’t stress this enough, take that cream cheese out of the fridge at least 2 hours before baking. Cold cream cheese will leave you with lumps in your cheesecake layer, and nobody wants that! If you’re in a pinch (we’ve all been there), microwave it for 10-15 seconds at 50% power. Just don’t let it get warm, we want softened, not melted.
Mix the brownie batter just until combined
Here’s where restraint comes in. When adding the dry ingredients to your brownie batter, mix only until you stop seeing flour streaks. Overmixing develops gluten, which gives you cakey brownies instead of the fudgy texture we’re after. A few small lumps are totally fine, they’ll disappear during baking.
Let them cool completely before slicing
I know, I know, the smell is intoxicating and you want to dive right in. But trust me, letting these bars cool completely (about 2 hours) gives the cheesecake time to set properly. For picture-perfect slices, chill them in the fridge for an hour first. Pro tip: run your knife under hot water and wipe it clean between cuts for those Instagram-worthy edges.
Don’t over-swirl the cherries
When adding the cherry pie filling, resist the urge to go crazy with the swirling! A gentle figure-eight motion with your knife is all you need. Too much swirling mixes the layers together, and we want those distinct cheesecake and brownie layers with pretty cherry pockets peeking through.
Use room temperature eggs
This little trick makes a big difference in getting smooth, lump-free batter. Cold eggs can make the melted butter seize up. Just set them out with your cream cheese, about 30 minutes does the trick. If you forget (no judgment!), place them in a bowl of warm water for 5 minutes.
Follow these tips, and you’ll have bars that look like they came from a fancy bakery, but with that homemade love that makes them extra special. Now who’s ready to bake? For more baking inspiration, check out these desserts!
Cherry Cheesecake Brownie Bars Variations
One of my favorite things about this recipe is how easily you can make it your own! Over the years, I’ve played around with so many variations, some were brilliant (if I do say so myself), and others… well, let’s just say they were learning experiences. Here are my favorite twists that always turn out amazing:
Fruit Swaps That Work Like Magic
While I adore the classic cherry version, sometimes I like to mix things up:
- Strawberry cheesecake brownie bars, Swap the cherry pie filling for strawberry. The pink swirls look gorgeous, and the slightly tart berries cut through the richness beautifully.
- Mixed berry bliss, Use a combo of raspberries, blackberries, and blueberries (fresh or frozen work great). Just chop any larger berries so they distribute evenly.
- Peach dream, In summer, I’ll use homemade peach compote instead of cherries. A sprinkle of cinnamon in the brownie batter takes it over the top!
Chocolate Lover’s Upgrades
For those days when regular chocolate just isn’t enough (you know the ones):
- Double chocolate chip, Fold ½ cup semisweet chocolate chips into the brownie batter before spreading. The melty pockets take the fudginess to new heights!
- Mocha madness, Add 1 tablespoon instant espresso powder to the dry ingredients. The coffee enhances the chocolate flavor without making it taste like coffee.
- Ganache glam, After cooling, drizzle with homemade chocolate ganache (equal parts heavy cream and chocolate). It looks fancy but takes just minutes to make.
Cheesecake Twists
The creamy layer is like a blank canvas for flavor:
- Lemon zest delight, Add the zest of one lemon to the cheesecake mixture for a bright, fresh contrast to the rich chocolate.
- Peanut butter paradise, Swirl ¼ cup creamy peanut butter into the cheesecake batter before adding the fruit topping.
- Cookie dough surprise, Drop small balls of edible cookie dough onto the cheesecake layer before swirling with cherries. Pure decadence!
The possibilities are endless, I’ve even done a Halloween version with orange food coloring in the cheesecake layer and blackberry swirls! Whatever variation you try, the key is keeping the basic ratios the same. Now go forth and get creative, I’d love to hear what delicious combinations you come up with! If you are looking for more creative dessert ideas, you might enjoy exploring recipesloop.com.
Storing and Serving Cherry Cheesecake Brownie Bars
Okay, let’s talk about the important stuff, how to keep these beauties fresh and serve them like a pro! I’ve learned a few tricks through trial and error (and maybe a few sad, dried-out batches early on). Here’s everything you need to know:
Keeping Them Fresh
These bars absolutely must live in the fridge, the cheesecake layer demands it! I store them in an airtight container with parchment between layers if stacking. They’ll stay perfect for up to 5 days (if they last that long in your house, mine never do!).
For longer storage, you can freeze them for up to 3 months. Wrap individual bars tightly in plastic wrap, then pop them in a freezer bag. Thaw overnight in the fridge when cravings strike, they taste just as amazing!
Serving Like a Boss
Temperature matters here! I like to serve them straight from the fridge, the cool cream cheese against the fudgy brownie is pure magic. If you want to get fancy:
- Let them sit at room temp for 10 minutes before serving to take the chill off
- Dust with powdered sugar right before serving for that bakery-fresh look
- Add a dollop of whipped cream and fresh cherries for special occasions
Reviving Leftovers
If you somehow have leftovers that dried out a bit (it happens to the best of us!), here’s my secret: microwave a slice for just 8-10 seconds. It brings back that just-baked texture beautifully. For frozen bars, I sometimes warm them slightly in the oven at 300°F for 5 minutes, the edges get delightfully crispy while the center stays creamy.
One last tip, these bars actually taste better on day two! The flavors have time to mingle and deepen overnight. So if you can resist eating the whole pan immediately (no judgment if you can’t!), you’re in for an even more delicious treat tomorrow.
Cherry Cheesecake Brownie Bars FAQs
I get so many questions about these bars whenever I make them, and I love that! Here are the answers to the ones that pop up most often. Consider this your cheat sheet for brownie bar success:
Can I use frozen cherries instead of pie filling?
Absolutely! Thaw 1 ½ cups frozen cherries first, then toss them with 1 tablespoon cornstarch and 2 tablespoons sugar to create your own quick “pie filling.” The texture will be slightly different but just as delicious. I actually prefer this method in summer when fresh cherries are in season!
How can I make these gluten-free?
Easily! Just swap the all-purpose flour with your favorite gluten-free 1:1 baking blend. I’ve had great results with Bob’s Red Mill and King Arthur brands. The texture might be a tad denser, but still totally crave-worthy. Just make sure your other ingredients (like cocoa powder) are certified gluten-free too.
How long do they last in the fridge?
They’ll stay fresh for up to 5 days when stored properly in an airtight container. The cheesecake layer might start to weep a tiny bit after day 3, but they’ll still taste amazing. Pro tip: I often make them 2 days before an event because the flavors get even better as they mingle!
Can I use a different pan size?
You sure can! For a 9×9 inch square pan, reduce all ingredients by one-third and bake for about 35-40 minutes. For mini muffin tins, bake for 18-20 minutes, perfect for parties! Just watch them closely as smaller pans cook faster. The toothpick test is your friend here.
Why did my cheesecake layer crack?
Don’t panic, they’ll still taste incredible! Cracking usually happens from temperature changes. To prevent it next time: don’t overmix the cheesecake batter (creates air bubbles), avoid opening the oven door during baking, and let them cool gradually in the oven with the door cracked for 10 minutes before moving to the counter. But honestly? I just cover cracks with extra cherry topping, problem solved!
There you have it, all my best answers to your burning brownie bar questions. Still have one I didn’t cover? Drop it in the comments below, and I’ll get back to you faster than you can say “Where’d the last bar go?”
Nutritional Information
Okay, let’s be real, we’re not eating these Cherry Cheesecake Brownie Bars for their health benefits! But I know some of you like to keep track, so here’s the scoop. Just remember these are estimates, actual numbers can vary based on your specific ingredients and how big you slice those bars (no judgment if your “serving” is two… or three).
Per bar (based on 12 servings):
- Calories: ~380
- Total Fat: 22g
- Saturated Fat: 13g
- Cholesterol: 120mg
- Sodium: 220mg
- Total Carbohydrates: 43g
- Dietary Fiber: 2g
- Sugars: 33g
- Protein: 5g
A quick disclaimer from my kitchen to yours: These numbers are calculated using generic ingredients and standard measurements. Your favorite brand of cream cheese or cocoa powder might change the numbers slightly. And hey, some things in life are worth every calorie, and in my totally unbiased opinion, these bars top that list!

Now that we’ve gotten the numbers out of the way (and possibly ruined the magic just a tiny bit), who’s ready to bake some memories? Trust me, one bite of these and you won’t be thinking about nutrition facts, just how quickly you can get the next bite!
Alright, my fellow dessert lovers, it’s time to turn your kitchen into a chocolatey, cheesecakey paradise! These Cherry Cheesecake Brownie Bars are waiting to become your new signature treat. Whether you’re making them for Valentine’s Day, a special occasion, or just because Tuesday exists, I promise they’ll bring smiles to everyone lucky enough to get a bite. Don’t forget to snap a photo of your masterpiece (I know they’ll be gorgeous) and share your results in the comments below. Did you try any fun variations? Have a brilliant tip I didn’t mention? I want to hear all about your baking adventures! Now grab that mixing bowl and let’s make some magic happen, your taste buds will thank you!


